Every year, the ZWO Astronomy Photographer of the Year competition brings together stunning views of the night sky from around the world. Organized by the Royal Observatory Greenwich and supported by ZWO in partnership with BBC Sky at Night Magazine , the competition showcases the incredible talent of both amateur and professional photographers. In 2025, a record-breaking 5,880 entries were submitted from 68 countries, capturing everything from distant galaxies to rare celestial events.
Now in its 17th year, the competition continues to reveal the beauty and mystery of space through breathtaking images. From glowing nebulae and star-studded skies to planetary portraits and lunar close-ups, this year’s shortlist is full of awe-inspiring moments. Here’s a sneak peek at some of the standout photographs ahead of the winners being announced on 11 September.
More info: rmg.co.uk | Instagram | x.com | Facebook | youtube.com
“On 7 November 2024, the Sun experienced a massive solar prominence eruption, with a length exceeding 500,000 km (311,000 miles). The eruption lasted approximately one hour from its initial outburst to its conclusion. The eruption phase of the prominence is composed of more than 20 stacked data sets highlighting the entire process of this spectacular event.” Taken with a Lunt LS60T telescope, Lunt B1200 filter, Proxisky UMI17R mount, ToupTek ATR428M camera, 500 mm f/7, ISO 100, 5-millisecond exposure. Location: Eastern New District, Xinxing County, Guangdong province, China, 7 November 2024
© PengFei Chou Report
“Realising that it was possible to photograph the Milky Way from this remote cave, Yoshiki Abe waited for the perfect conditions to take the image. This is a composite photograph. Both parts were taken on the same night and at the same location, but the foreground was shot during the blue hour then the tripod was shifted to capture the Milky Way.” Taken with a Sony ILCE-7RM5 camera, 20 mm. Foreground: f/16, ISO 200, 30-second exposure, 3-frame panorama; Sky: f/1.4, ISO 800, 60-second exposure (stack of 51 frames); H-alpha: ISO 3,200, 90-second exposure (stack of 64 frames). Location: Nagato, Yamaguchi, Japan, 12 October 2024
© Yoshiki Abe Report
“NGC 2997 is a barred spiral galaxy (type SBc) in the constellation of Antlia. At 35 million light years distance, it has a visual magnitude of about 9.5, making it visible with binoculars in dark sites. The region is full of background H-alpha emissions, giving wonderful colour to the image.” Taken with a ASA 500N telescope, Astrodon LRGB and H-alpha filters, ASA DDM85 mount, FLI ProLine 16803 camera, 1900 mm f/3.8, 600 seconds per frame for LRGB, 1,200 seconds per frame for H-alpha, 10 hours total exposure. Location: El Sauce Observatory, Río Hurtado, Chile, 23 January, 4–5 February 2025
© Xinran Li Report
“The Beaver Moon was the last supermoon of 2024. This photograph was taken from the hazy, Bortle 9 skies of Delhi. The full-disc mosaic is composed of 24 images then stitched together to create a seamless mosaic. " Taken with a GSO RC 6” telescope, ZWO IR/UV cut filter, Explore Scientific EXOS-2 PMC-Eight mount, ZWO ASI662MC camera, 1,370 mm f/9, 24 x 30-second videos, 50% of frames stacked per video. Location: Laxmi Nagar, Delhi, India, 15 November 2024
© Karthik Easvur Report
A panorama of the Cygnus region of the “Milky Way from Gerakies, Cyprus. The foreground was captured during blue hour to achieve more detail on the distant mountains and trees directly in front of the camera.” Taken with a Sony ILCE7M4 camera, Move Shoot Move Nomad, 35 mm f/2, ISO 400, multiple 30– and 120-second exposures. Location: Gerakies, Nicosia District, Cyprus, 30 October 2024
© Andreas Karaolis Report
“The photographers travelled to Namibia to view Comet C/2023 A3 (Tsuchinshan-ATLAS) in the southern hemisphere. Due to the angle of the observation, the dust and ion tails seem to have overlapped, but the impact of solar winds on the day caused noticeable kinks in the ion tail.” Taken with a ASA 12-inch Astrograph, ASA DDM85 mount, ZWO ASI6200MM Pro camera, 1,097 mm f/3.6,L 200-second exposure, R 100-second exposure, G 100-second exposure, B 100-second exposure. Location: Tivoli Astrofarm, Windhoek Rural, Namibia, 30 September 2024
© Gerald Rhemann and Michael Jäger Report
“Abell 85 is a supernova remnant situated in the Milky Way galaxy that appears to some to be shaped like a pomegranate. This target is faint. The OIII signal in particular is exceedingly weak. To fully capture the signal, Deqian Li spent six days camping in Hongyuan County.” Taken with a Takahashi Epsilon-160ED telescope, Sky-Watcher EQ6-R mount, ZWO ASI2600MM Pro camera, 530 mm f/3.3, ISO 100, 23.4 hours total exposure. Location: Hongyuan County, Ngawa Tibetan and Qiang Autonomous Prefecture, Sichuan, China and Yingshan County, Nanchong, Sichuan, China, 30, 31 August, 1 and 3–5 September 2024
© Deqian Li Report
“IC 2944, the Running Chicken Nebula is known for its unique avian shape. NGC 3766, an open star cluster, appears as a sparkling jewel box that contrasts with the diffuse nebulosity. In the top left, filamentary shell G296.2-2.8, displays delicate, thread-like structures that weave through the cosmic backdrop.” Taken with a William Optics RedCat 51 II telescope, Antlia 3 nm SHO 36mm and Baader CMOS Optimized RGB 36 mm filters, Sky-Watcher NEQ6–Pro mount, ZWO ASI2600MM Pro camera, 250 mm f/4, 42 hours 15 minutes total exposure. Location: Hillcrest, Queensland, Australia, 29 and 30 March, 2, 3, 8– 15 April 2024
© Rod Prazeres Report
“This photograph captures the rare occurrence of Northern Lights in California. Vibrant ribbons of magenta and green light up the sky, reflecting in the still waters among the rock formations.” Taken with a Sony ILCE-7III camera, 14 mm f/1.8, ISO 8,000, 5-second exposure. Location: US 395, Mono Lake, Mono County, USA, 10 October 2024
© Daniel Zafra Report
“This image shows countless resolved stars, emission nebula and a mysterious central bulge. The photo is incredibly detailed, the mist surrounding the galaxy is actually tens of thousands of yellowish tiny stars. PixInsight and AstroPixelProcessor were used for pre-processing and the mosaic. Defects were corrected using a technique called Multi-Scale Gradient Removal, using wide-field data. During the process, BlurXTerminator, StarXTerminator and NoiseXTerminator were used and the final adjustment was done in Photoshop.” Taken with a William Optics 12" f/8 Ritchey-Chretien Truss Tube, GSO 14" f/8 Ritchey-Chretien Truss Tube and Takahashi Epsilon 160 telescopes, iOptron CEM120EC and Sky-Watcher EQ8-R Pro mounts, ZWO ASI6200MM Pro camera, 2,272 mm f/6.4, Gain 100, 216 hours total exposure time. Location: Daocheng County, Garzê Tibetan Autonomous Prefecture, Sichuan, China, 30–31 October, 1–6, 20–30 November, 1–10 and 20–31 December 2024
© Chuhong Yu, Jingyao Hong, Xi Zhu, Yaguang Wan Report
“This full-spectrum image of the Spaghetti Nebula unveils the faint and elusive nature of this supernova remnant (SNR), hidden behind a vast cloud of dust that obstructs its emission light. To enhance its visual appeal, Shaoyu Zhang dedicated considerable time to capturing OIII data, intensifying the blue and green hues, while allowing SII and H-alpha to support high dynamic range stretching for added depth.” Taken with a Takahashi FSQ-106EDXIII telescope, Astrodon LRGBHSO filters and Chroma LRGBHSO filters, 10Micron GM 2000 HPS and Sky-Watcher AZ-EQ6 mounts, Canon EF 400 mm f/2.8 II IS USM lens, Moravian Instruments G4-16803 and ZWO ASI6200 cameras, 382 mm and 391 mm, f/3.6 and f/2.8, 148.33 hours total exposure. Location: Deep Sky Chile Observatory, Camino del Observatorio, Río Hurtado, Chile and Xiangcheng, Garzê Tibetan Autonomous Prefecture, Sichuan, China, 21, 24 and 25 December 2024, 3–5, 15, 16, 19–31 January, 1–6, 10–19 February 2025
© Shaoyu Zhang Report
“The photograph captures a remote location on the Senja Peninsula in northern Norway. In the foreground, birch trees beautifully reflect the colors of the dancing aurora in the sky.” Taken with a Sony Alpha 7R V camera, 12 mm f/2.8 (with focus stacking for foreground), ISO 4,000, 2-second exposure. Location: Stavelitippen, Fjordgård, Norway, 12 September 2024
© Filip Hrebenda Report
“This work consists of two mosaics, each panel exposed for 75 hours, capturing numerous popular targets. It highlights the Rosette Nebula and Christmas Tree Nebula, both symbols of beauty. The image supports multiple viewing angles, offering fresh experiences with clockwise, anticlockwise and vertical flips.” Taken with a Takahashi FSQ-106EDXIII telescope, Astrodon LRGBHSO filters, 10Micron GM 2000 HPS mount, Moravian Instruments G4-16803 camera, 382 mm f/3.6,150 hours total exposure. Location: Deep Sky Chile Observatory, Camino del Observatorio, Río Hurtado, Chile, 6– 13, 22– 29 November, 1– 9, 12, 13, 18– 24 December 2024
© Shaoyu Zhang Report
“Taken on the evening of 12 October 2024 at Pu’u O Kaimukī Park, Ran Shen joined many residents and astrophotographers in Honolulu, Hawaii, to witness the passage of Comet C/2023 A3 (Tsuchinshan-ATLAS), one of the most anticipated astronomical events of the year.” Taken with a Nikon Z 8 camera, 110 mm f/4.5, ISO 2,500, 2.5-second exposure. Location: Honolulu, Hawaii, USA, 12 October 2024
© Ran Shen Report
“The Milky Way arcs over Lulworth Cove, where just a short walk from the water’s edge, there’s a fish and chip shop, boathouse, and a little boat that sit quietly at night.” Taken with a CanonR6 Mark II camera, Benro Polaris mount, Foreground: Tamron 24-70 mm lens, 38 mm f/22, ISO 800, 3.2-second exposure, Sky: Samyang 14 mm lens,14 mm f/2.8, ISO 3,200. Location: Lulworth Cove, West Lulworth, Dorset, UK, 16 March 2024
© Paul Joels Report
“The full Moon rising above the rugged peaks of the Dolomites. With no clouds in sight and in flawless conditions, the golden light of sunset bathes the mountains, creating harmony between Earth and sky.” Taken with a Sony Alpha 7R V camera, 400 mm f/9, ISO 320, 1/200-second exposure. Location: Santuario di Pietralba, Deutschnofen, South Tyrol, Italy, 15 November 2024
© Fabian Dalpiaz Report
“The image shows M33, the Triangulum Galaxy from a new perspective. Due to tidal interaction with M31, there is very prominent star-forming activity in M33, which results in a spectacular structure of emission nebulae. During processing, a separate SHO picture was created with a strong SII/H-alpha presence, the glowing red structures in the picture, and blended with a high-resolution LRGB processing of the continuum data, representing the ‘background’ light.” Taken with a custom-built 250/1000 Newtonian astrograph and Lacerta 300/1200 Photo Newtonian telescope, Antlia V-Pro LRGB and 3 nm H-alpha, OIII and SII filters, Astronomik LRGB and 6 nm H-alpha, OIII and SII filters, Sky-Watcher EQ8-R Pro mount, ZWO ASI2600MM Pro and ASI294MM Pro cameras,1,000 and 1,200 mm f/4, 8.4-hour L exposures, 6.8-hour R exposures, 6.7-hour G exposures and 6.3-hour B exposures, 39.3-hour H-alpha exposures, 15.3-hour OIII exposures, 28.3-hour SII exposures. Location: Sződliget, Pest and Törökkoppány, Somogy, Hungary, 2–4, 9, 23,30 November, 1, 27 and 28 December 2024
© Bence Tóth, Péter Feltóti, Bertalan Kecskés Report
“This impressive panorama is a view from the Utah desert. 23,000 pixels wide, the photograph shows the desolate, character rich landscape, below a starry Milky Way.” Taken with an astro-modified Canon EOS R and EOS R5 cameras, 28mm f/2.8 and f/8, ISO 800 and 100, Sky: 59-second exposure, Land: 3-second exposure. Location: Moonscape Overlook, Wayne County, Utah, USA, 11 April 2024
© Jim Hildreth Report
This image shows the western view from “Mount John Observatory, New Zealand’s premier optical observatory. To the right is the MOA-II telescope, the largest telescope in the country. Due to the southern hemisphere location of the observatory, the Milky Way sets in parallel to the horizon, which allows for striking compositions.” Taken with a Nikon Z 6 camera, Sky-Watcher Star Adventurer mount, 35 mm f/1.4, ISO 1,600, 25-panel mosaic. Location: Mount John Observatory, Mount John, Lake Tekapo, New Zealand, 21 July 2024
© Chester Hall-Fernandez Report
“This is a composite image that brings images of both the Moon and Saturn together to show the lunar occultation of Saturn. A lunar occultation of Saturn occurs when the Moon passes in front of Saturn, temporarily blocking its light from Earth. This event is brief and can be observed as the Moon obscures the planet.” Taken with a Svbony SV503 80ED telescope, Svbony 2x Barlow lens, iOptron CEM70 mount, QHYCCD QHY485C camera, 560 mm f/7, Moon: 0.23-millisecond exposure, Saturn: 4-millisecond exposure. Location: Bua Yai, Bua Yai District, Nakhon Ratchasima, Thailand, 15 October 2024
© Chayaphon Phanitloet Report
“This image presents all the planets of our Solar System, excluding Earth, showcasing their unique characteristics. Mercury, the closest to the Sun, is a barren, cratered world, while Venus is shrouded in thick clouds. Mars, the Red Planet, has vast deserts and the largest volcano in the Solar System. The gas giants, Jupiter and Saturn, dominate with their immense size and swirling storms, while Saturn’s rings make it especially striking. Uranus and Neptune, the ice giants, are rich in methane, giving them their blue hue.” Taken with a Spacewalk Telescopes Horizon 20" f/3.2 Dobsonian, Tele Vue 5x 1.25" Powermate, Spacewalk Telescopes EQ-Platform ‘Trackie’, Player One Astronomy Uranus-C camera, thousands of <10-millisecond exposures. Location: Bobingen, Bavaria, Germany, 11 September 2023, 7 September, 29 August and 28 December 2024
© Sophie Paulin Report
“In April, there is no ‘true’ night in northern Norway. This is why the Northern Lights look much more blue than usual. Vincent Beudez captured the visually pleasing aurora shape above the Norwegian background.” Taken with a Sony Alpha 7S III camera, 14 mm f/1.8, ISO 4,000, 1.3-second exposure. Location: Sjursnes, Tromsø, Troms, Norway, 4 April 2024
© Vincent Beudez Report
“This image captures the International Space Station (ISS) transiting across the solar disc. The solar background was captured separately with double-stacked etalon[an optical filter that isolates specific wavelengths, used to observe solar details], and reveals high-contrast chromospheric details. The imaging sequences were strategically combined during post-processing to preserve both the spacecraft’s crisp silhouette and the Sun’s intricate surface features.” Taken with a Takahashi Teegul 60 telescope, Coronado SolarMax 60 double stacked, Vixen polaris mount, Player One Astronomy Neptune-M camera, 500 mm f/8.3, 0.3-millisecond exposure. Location: Xiamen, Fujian, China, 24 January 2025
© Zhang Yanguang Report
“Under the night sky, several black geometric buildings appear to stand on the water’s surface, resembling gateways to the galaxy. The bright Milky Way stretches across the sky behind them, with stars twinkling. The reflections of the buildings shimmer in the water, blending reality and illusion, as if opening a passage to the mysteries of the Universe, inspiring endless reverie and a longing to explore the vast starry sky.” Taken with a Nikon Z 8 camera, 15 mm f/4, ISO 2,000, multiple 480-second exposures. Location: Songyang County, China, 10 August 2024
© Yujie Zhang Report
“The data from NASA’s Solar Dynamics Observer (SDO) probe was used here to show the Sun’s inner corona in a way that hints at a process that is similar to that which energises colourful neon lights on Earth. Images taken by the SDO in the ultraviolet spectrum (at 171, 193 and 304 nm) were re-mapped to a more vibrant palette, with the same coronal data turned ‘inside out’ to surround the Sun, creating the illusion of it being enclosed in a neon tube. While neon tubes use electrical current to cause the low-pressure gas within them to glow, it is the heat from nuclear fusion that ionises the gas of the Sun’s atmosphere. While this ultraviolet light is undetectable to human eyes, it can easily cause sunburn on unprotected human skin within just few minutes of exposure. Remapped in Photoshop, the data was then polar inversed to mirror the inner coronal image. Colour saturation was increased by around 30 per cent and given one pass of a noise reduction filter.” Original data from NASA SDO 171, 193, 304 nanometre from 1 June 2024 Data credit: NASA
© Peter Ward Report
“A solitary dragon tree stands tall in the heart of Socotra’s Dragon Blood Tree forest – an otherworldly landscape unlike anywhere else on Earth. The final image is composed of 300 individual exposures.” Taken with a Sony Alpha 7 IV camera, 24 mm f/2.8, ISO 400, 30-second exposure. Location: Firmihin Forest, Hidaybu District, Yemen, 13 March 2024
© Benjamin Barakat Report
“This photograph captures a red Full Moon rising beside Shanghai’s tallest skyscrapers in Lujiazui. Taken from a distance of 26.5 km (16.5 miles) from the skyscrapers in a single exposure, this image’s alignment took five years of planning. The Full Moon appears perfectly positioned next to the illuminated skyline, creating a striking contrast.” Taken with a Sony ILCE-7RM4 camera, 600 mm f/4, ISO 250, 1/10-second exposure . Location: Jiading District, Shanghai, China, 21 July 2024
© Tianyao Yang Report
“This 22-megapixel panorama shows the different stages of the full solar eclipse, with a high dynamic range (HDR) image of totality in the middle. This reveals both the bright corona and finer details otherwise lost in standard exposures. The final image uses approximately 200 images with varying exposure times to create a HDR totality, before combining everything together.” Taken with a Canon EOS 60D camera, SWSA 2I mount, Sigma 70-300 DG lens, Baader solar filter, 300 mm f/6.3, ISO 100, approximately 1,200 x 1/200-second exposures and 200 x 1/25-second exposures. Location: Coaticook, Quebec, Canada, 8 April 2024
© Louis Egan Report
“This unique photograph was taken 6.4 km (4 miles) from the château of Villebois-Lavalette, just north of Bordeaux. The distortions are related to the distance between the imaged Moon and the foreground but also with respect to the atmospheric disturbance, hence the curves on the surface of the Moon.” Taken with a Canon EOS R7 camera, Sigma 150-600 mm lens at 600 mm f/6.3, ISO 2,500, 1/50-second exposure. Location: La Font Aride, Saint-Amant-de-Montmoreau, France, 16 November 2024
© Flavien Beauvais Report
“Baily’s Beads are bright spots around the Moon during a solar eclipse that are caused by sunlight passing through lunar valleys. This composite shows the progression, from left to right, from the first ‘diamond ring’ – a moment when one last bright point of sunlight shines beside the faint corona, resembling a diamond on a ring – fading through Baily’s Beads into totality and beyond until a ‘diamond ring’ occurs again as the Sun starts to reappear. " Taken with a Sky-Watcher Evolux 62 ED telescope, Celestron NexStar Evolution mount, ZWO ASI2600MC Pro camera, 360 mm f/5.8, Gain 100, Diamond Rings: 200 x 1/ 3-second exposures Baily’s Beads: 400 x 1/ 6-second exposures, Totality: stack of 7 x 1/400-second exposure. Location: Dexter, Missouri, USA, 8 April 2024
© Damien Cannane Report
Anyone can write on Bored Panda. Start writing!
Follow Bored Panda on Google News!
Add Your Photo To This List
Please use high-res photos without watermarks
Ooops! Your image is too large, maximum file size is 8 MB.
Not your original work? Add source
Unlock an Enhanced Experience with Bored Panda Premium
Go ad-free, access unlimited content, and enjoy our sleek dark mode. Your favorite stories, uninterrupted.
No fees, cancel anytime

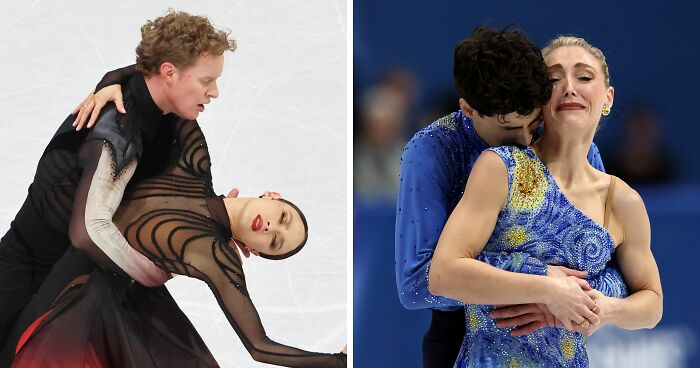
Olympian Makes Stunning Admission After Judge’s Conspicuous Scores Ignite Cheating Accusations
One may buy the most expensive photography gear, yet one can’t buy an eye for a good photo. Just like with any creative skill, imagination and a creative approach are key. However, while quality equipment certainly wouldn’t hurt, it’s really about knowing how to utilize the tools and functions already available in your hands. Some of the best photography hacks do exactly that: they teach you to use tools already available or easily accessible to achieve your best photo result.
Ironically, among the many great photography hacks are tips and tricks you may already know about. Perhaps you just forgot, or it’s something so basic that it simply never crossed your mind. However, plenty of photography tips can also be new, depending on how long you’ve been in the field. Whether you are looking for photography tips for beginners or want to hone your skills, you’re likely to leave this article with your creative juices flowing overboard and new ideas popping up!
One of the simplest smartphone photography tricks is this one. To create a reflective surface with your smartphone, place your phone’s screen at the bottom of the DSLR. This popular technique can make a distinguished appearance and feel in your photographs.
Report
Another quick photo frame hack. You can take stunning images with natural light from the setting sun and a few old, no-longer-usable picture frames.
Jordi Koalitic Report
The Japanese word “bokeh” describes the blur in an image’s out-of-focus area. Cut out intriguing shapes like tiny circles or stars from black poster board. Use the poster board to cover the lens and try out various focal lengths.
Report
The majority of marbles are made of glass. However, photographing marbles differs from photographing other kinds of glass. This results from the marbles’ smooth, spherical surface, which tends to reflect a lot of light from its surroundings. With appropriate lighting and settings, your photos incorporating marbles will look absolutely phenomenal.
Jordi Koalitic Report
You can create creepy yet amazing-looking pictures with just a few items. Just trust the process.
Jordi Koalitic Report
This approach will help you produce more focused lighting in your photographs and consume an entire tube of Pringles in one sitting, so you’re sure to like it. Also, you may want to reduce the size of the container’s bottom opening so that a flash head can fit snugly through it.
N-Photo Report
You can take some incredible photos using fairy lights. And the best bit is that they are really affordable! One of the best uses for fairy lights is as a foreground bokeh close to the camera. Such placement will give the light the appearance of fuzzy spots and thus sweeten your photograph. You can also use fairy lights to illuminate objects like a lightbulb or a Mason jar.
Brandon Woelfel Report
A topic or object will appear larger the closer it is to the camera, especially when compared to a subject or object farther away. The same goes for making something appear smaller by keeping it further from the camera.
COOPH Report
If you have a spare pair of reading glasses lying around, try creating a magnifying effect by holding the glasses in front of the lens. It can get you a similar result to lens ball photography without the financial outlay.
Report
You might have seen this one on YouTube. Plenty of video tutorials show how you can equip your glass coffee table to create outstanding photos. You can place anything you wish on the tabletop, perhaps some tealights, leaves, or sand, and ask your model to lay under the table. While it may seem simple, shooting through the glass this way can bring an entirely new layer of depth to your image.
cnhphotography Report
Set up your camera on a tripod and take images every 10-20 seconds or as required until you have captured every part of the scene unobstructed. The more shots you have of the scene unobstructed, the better.
Open Photoshop and select File > Scripts > Statistics.
Set it to “Median.”
Open all the files you want to use.
If it was not shot on a stable tripod and the images do not line up perfectly, select “Auto-Align.” Note that this only works for solid structures. If a tree/object has moved because of wind, this won’t help.
windsywinds , toomanyadapters Report
Suppose you don’t have the chance to shoot in a studio or cannot locate the ideal location. In that case, your TV makes a wonderful prop to create an impressive background. Simply select the desired photo, put it on the TV, and hit the shutter. The TV is one of many fantastic photography accessories that might provide an excellent background for portrait shots. If you’re photographing products, go with something smaller, like your computer monitor.
Report
In design, the positioning of visual components so they align in a composition is known as alignment. Both in design and photography, alignment is utilized to arrange elements, group them, provide balance, establish relationships between photo components, and produce a distinct result.
Jordi Koalitic Report
To create a sparkling ring of fire, you will need a few things: wire, sparklers, and tape. This quick photography hack will surely provide you with some fascinating results. But hey, be careful with the sparklers and come up with something other than your hands to hold the ring!
COOPH Report
Want to take underwater pictures but don’t want to spend money on expensive or, worse yet, cheap housing that leaks? Simply put your smartphone in a cup made of clear plastic or glass and submerge it. For larger cameras, a vase or fish tank can be used. Get pictures of your subject in the bathtub or pool by simply lowering the lens below the water’s surface. But be careful not to drop the cup or fish tank, or whatever you are using, into the water!
COOPH Report
This clever photography tip dates back to the 1990s. And like most other throwbacks from the 1990s, it’s one to hold onto. Hold a CD in front of the camera to reflect light back into the camera’s lens. For making lens flares that appear to move randomly, this is perfect.
Sheldon Evans Report
You can take a photo directly across from the natural light source to capture shadows. Or, you can place a strainer over your camera’s flash. A what? A strainer, but any cooking tool with unique holes and shapes will do. Improve your portrait photography portfolio by experimenting with light to provide a special effect. You might also use window blinds, palm leaves, or anything crochet to create an interesting shadow.
Report
Shadows help define form and shape, but they may also evoke a sense of mystery and intrigue by changing the appearance of otherwise identifiable objects. In contrast to conventional photography, shadow play photography emphasizes narrative, emotion, and the creative use of shadow. Just keep trying new things and different lighting, be daring with your concepts, keep it lighthearted, and dazzle the spectators with your originality!
Jordi Koalitic Report
You can create a soft-focus lens effect using items you probably have lying around your house. Try using a cloth or a bandage and wrapping it around your lens for a soft, blurred-frame effect.
freepeople Report
In product or food photography, the background is one of the most crucial stylistic elements. These days, it’s popular to utilize a negative space strategy to eliminate any distracting components. A cloth or paper can ideally make up for a simple plain backdrop. However, instead of only placing the background behind the subject, it is advised to organize it so that it can easily change from a vertical to a horizontal surface. This is one of the photography backdrop tricks that gives the appearance of an “infinity curve,” evoking an obscure space surrounding the subject. In photography, an infinity cove or infinity cyclorama is an entirely white area with no edges used to create the illusion that an object’s background is infinite.
Taylor Mathis Report
Equipping the technique demonstrated above, you can take “wildlife” pictures in the comforts of your own bedroom. Literally.
Satyajit Sardar Report
Want to transform your standard camera lens into a macro lens? All you really need is a cardboard paper towel roll (you could use a TP roll, but the effects would be slightly different). You want at least 10 centimeters or so of the tube. Cut the tube and then use black paper to line the inside of the tube so that the “lens” port is dark.
COOPH Report
A clever use of a spring can give the impression that you have some sort of superpower! Spring man? There are many ways to go about this. Just put your creative hat on!
Jordi Koalitic Report
High-speed photography literally takes your photos to the next level. High-speed might initially seem impossible to take at home, but this simple instruction will teach you how to freeze action. A tripod and a subject are the first things you’ll need; the subject might be anything from a glass of water to painted balloons. In addition, you will need a solid backdrop and a wireless external flash (Speedlight).
COOPH Report
A cucoloris is a term for fake windows used in photography and cinematography. Any object or gadget that creates a pattern of shadows on a scene qualifies. They can also be referred to as cookies informally. A gobo or go-between is another name for them. It can refer to any object placed between the light source and the scene you are recording or photographing.
Report
When you notice anything intriguing, take a moment to check that the horizontal and vertical lines are straight before clicking. Today, it’s become ingrained in all of us to point our cameras in the general direction of the subject we photograph. We suggest you line yourself up perfectly with that structure or person.
Report
Warning : using this hack may cost you a new background paper roll!
cnhphotography Report
Want to produce a foggy, ethereal effect? To make it happen, all you need is a plastic quart bag. Cover your lens with a plastic sandwich bag to create a DIY haze filter/effect. But make sure there are no breadcrumbs left inside the bag!
Sheldon Evans Report
You may add lens flares to your photos the organic way by shining a flashlight directly into your lens!
Peter McKinnon Report
A lightbox is often essential for any product photography that calls for taking well-lit pictures of small objects. However, a cardboard box and a piece of plain white fabric might work just as well to create your own lightbox! Using tape and scissors, you can rig it yourself and save some precious dollar bills. Oh, and don’t forget the desktop lamps placed on both sides!
youtube.com Report
The definition of beauty is in the eye of the beholder. Even though everyone is charmed by a vast range of physical characteristics (thank goodness!), science has asserted facts about what we are biologically inclined to find more appealing. In fact, contrary to what was predicted, asymmetrical faces were widely perceived as more attractive.
cnhphotography Report
You may bring your photography abilities to new creative heights with various macro photography tips, such as utilizing a magnifying glass to create close-up shots. Also, you may include the magnifying glass in the frame to give your photo a unique flair.
Report
Follow the direction above to make your photos look like they were taken in the ’90s!
COOPH Report
If you discover an image that reflects the exact same from top to bottom or from right to left, your viewer will turn over with delight! How often do we see something every day and then see a photographer take a picture that shows an entirely different angle of the same thing? Not so often!
Report
If you don’t want to risk shooting in the rain and getting your expensive gear wet, but still need that raining sensation in your pictures, you may want to try one of the easiest photography tricks. Simply use a picture frame and a spray bottle. Spray water on the glass surface to make raindrops. For a spectator, it’s really hard to tell that those are not “real” raindrops.
Report
Another unexpected tool that may reduce glare? Save those Starbies’ coffee sleeves for your upcoming shoot outdoors. You can use them when the sun causes glare on your camera lens.
Peter McKinnon Report
Colored filters are precisely what they sound like — a piece of tinted glass that you place in front of the lens. These filters’ effect relies on the filter’s color and alters how the camera perceives light. However, while the results may not be the same, you can try DIYing your own color filter using transparent scotch tape and markers before investing in one.
Olivier Schmitt Report
You may make your portraits appear more dramatic by simply adding shadows. It gives a flat image some punch and makes it more attractive. For this reason, looking for ways to add shadows on purpose may be a brilliant idea. And one of the simplest ways to do so is by utilizing lace.
Maddie Lullaby Report
This method is a brilliant choice for a homemade soft light. All you need is an intense light and something to hang the shower curtain from, which you most likely already have or can easily pick up at the shop.
Report
Give one of the many glasses you likely have in your kitchen cupboards another purpose by using it as a lens filter to create an interesting effect.
Wolfeye Report
Getting down to your subject’s eye level, whether it’s a squirrel or a bird, can create a very intimate and natural shot. However, laying down and using your elbows as camera support is neither comfortable nor solid enough to reduce camera shake and ensure proper, sharp images. Thus, placing a bag of lentils may be the solution!
techradar.com Report
Want to give your photographs a little color or diffusion? Put a nylon stocking over the lens (borrow from your mother or a girlfriend if you don’t have one lying around). You can create your own DIY lens filter by securing it with a rubber band. Also, You can try something more vibrant using colored stockings or neutral with a white pair.
Report
Any food photographer or product photographer will love this technique: use a simple steamer that is out of the shot to add steam to your photographs.
nicolesyblog Report
This hack only requires a few glow sticks, which you can typically get for $1 at any store, a model, and a dark setting. Adjust your shutting speed and have your model draw shapes in the air!
Report
To create the appearance of windblown hair, ask your model or someone to assist in holding a hair dryer. This DIY photography tip should also be helpful for those who take self-portraits!
Clicknetwork Report
Try out this DIY photography hack to produce outstanding food photos and make them appear vivid and dynamic! To surround your subject with clouds, you’ll need to add some flour. Yes, flour you make pancakes with. To create your magical photo, follow these steps:
Plan your shoot using a sketch.
Gather the props and equipment.
Make a DIY cloud gun.
Keep all objects in place with glue and knitting needles.
Arrange the composition to make it steady and still.
Use two light sources for lighting the scene.
Take the photo step-by-step.
Edit your magical photo in post-processing. Voila !
expertphotography.com Report
Duck-tape your phone to the ceiling and go under it to take a perfect top-down photo for your Instagram.
happygreylucky Report
You’ve undoubtedly heard a million times to stand with your back to the sun to prevent your subject from seeming too dark in a photo, but if you are clever about what blocks the sun, you can obtain a beautiful outdoor shot.
Report
You can improve the lighting on your face by using something as simple as a whiteboard.
Jwalt Photography Report
This is a tried-and-true old trick. Early Hollywood film directors would apply vaseline to their lens filters to create a dreamy effect. By using this technique, you may give your subject a subtle shine without applying too much makeup. However, vaseline should be applied on clear plastic wrap or a filter rather than the lens itself.
Report
If you want a clear image with an unusual reflection, try utilizing a black backdrop with a black tile underneath your product. It will enhance any product image without being too distracting.
Report
Ask your model to pose in front of some shrubs or trees to make a stunning nature image.
Report
Light tables can be handy for taking beautiful product photos. Using this tutorial above and a basic cardboard box, you can easily make your own.
popphoto.com Report
Your already helpful Gorillapod can become even more practical with this method. Drill a small hole in your Gorillapod’s feet and insert magnets that fit inside its leg. However, it’s essential to understand that this modification will nullify the warranty on your Gorillapod!
Report
Using a wristband to minimize zoom creep will help you avoid the annoying issue of your camera lens moving owing to gravity.
Report
Every good photograph includes three main centers of interest, which are achieved by having one in each third of the overall image. Remember that it doesn’t have to be completely level. For a genuine pro vibe, move off-center.
Report
Your photographs will appear to have film burn thanks to this easy method: simply hold a lit match in front of your lens while shooting. But be careful and don’t burn yourself or your expensive camera!
unknoSheldon Evanswn Report
Using a photo frame in photography is no news. However, the real magic happens in post-processing. Just trust the process.
cnhphotography Report
Use this technique to create beautiful, dreamlike photos of paint dissolving in water. With this technique, you may see a slow-expanding effect or something that appears more like evil tentacles spreading throughout. What happens in the few seconds after the paint drops into the water will very much depend on the density of the paint you use. Thus, play around with your paint before taking pictures to determine its density. If the paint is too thick, it won’t dissolve in water and will sink to the bottom of the tank. However, if it is too thin, it will dissolve rapidly and have a limited range of color density.
Report
We can almost see your puzzled expression at this point. And indeed, this hack is a tricky one. While you don’t need expensive equipment to experiment with photoelasticity, you do need a few specific things. Those are a polarizing filter, transparent plastic objects, and a polarized light source. Unfortunately, traditional lighting sources like the sun, lamps, LEDs, and flashbulbs do not emit polarized light and won’t do. In fact, if you are contemplating what kind of light source to utilize, you are currently looking at it. Your phone, tablet, or computer’s LCD screen all output polarized light in one plane.
Report
It’s incredible how simple it is to take excellent pictures if you know just consider the following: if you are taking a shot of someone outside and the sun is right behind them, the subject will appear like a shadow (which could also work to make a silhouette photo). All you have to do is move them to face the sun, and they will be well-illuminated. However, avoid direct sunlight if you don’t want your subject to squint or have over-exposed areas in your photos!
Report
If red eye consistently ruins your pictures, give this a try: when using the flash, have your subject look slightly above the camera.
Report
You may have noticed that both DSLR and phone cameras’ flash pops up as soon as it gets slightly darker, despite not always being needed nor desired. While flash photography works great in dim and poorly lit environments, taking photos with a flash actually requires some knowledge to make it work. However, in everyday scenarios or basic photoshoots, no flash should work just fine. If the area you are taking photos in is relatively dim, switch off the flash and raise the ISO instead. Increasing your ISO will make your camera’s shutter speed faster in all modes other than Manual and Shutter Priority, giving you a better chance of capturing moving subjects. Now take the picture.
Report
Honestly, simple photos that allow for the subject to breathe make for the most incredible images. So go ahead and find the plainest background you can. For the spectator, the experience of looking at a busy vs. simple photo is the same as the difference between stepping into a super-cluttered home or a clean, minimalist setting with few distractions. Take the extra time to look around and pick a simple background that doesn’t draw attention away from the subject if you shoot an image of a person.
Report
The easiest and least-used tip in the photographer’s handbook is arguably the rule of thirds. How to utilize it? Go into your camera’s menu and select “Grid,” which will display a grid with horizontal and vertical lines as you look through the viewfinder. With the help of the grid, place your subject in the left or right third of an image, leaving the other two-thirds open. Although there are different types of composition, using the rule of thirds usually results in interesting and well-composed photos. Most amateur photographers center their subjects in the center of the frame. Good try but BO-RING!
Report
Family photos are difficult to take. Unless you don’t mind running back and forth to set the timer off, have a remote shutter control, or are an iPhone user. You can actually shoot pictures using the volume control on your iPhone headphones (the ones that used to come in the box). If you own an Apple watch, you can also make it function as a camera remote!
Report
Here is another trick utilized for as long as tripods have existed. Just put some cotton or felt pads on the tripod’s feet. If the flooring is smooth (a cobblestone walkway WON’T do), you can use your tripod as a dolly to create smooth panning views and time-lapse videos.
Report
Most believe that to capture the entire scene, they must take a huge step back and leave plenty of space around the subject. One must remember that occasionally, you can cut off your subject’s forehead, legs, or lower body from the frame. They are not a mime trapped in an invisible box! The issue with always having the camera zoomed out so much is that the viewer isn’t immediately made aware of the photo’s purpose or subject. As is often said, the simpler your shot is, the better. The most compelling images make it crystal clear to the spectator what “narrative” you are trying to convey. If you are trying to convey their emotion, such as anger or sadness, use a close-up of their brows and eyes. While hands can help convey anger through clenched fists, hands may not help convey a feeling of despair.
Report
In the introduction, we mentioned that some people simply have an eye for photography. And while some may actually be born with it (lucky folks), it’s also a skill that can be acquired. Look at the structures you pass, the windows you see, the brickwork patterns, etc. One unexpected “click” may allow you to realize there is a pretty fascinating pattern in the brickwork of a building you pass through every day.
Report
Most photographs that viewers see are taken at eye level from the photographer’s vantage point, which is also how we perceive most of our daily experiences. We don’t often view cities from that perspective, so it’s not surprising that they are aesthetically magnificent when you climb to the top of a tall structure and look down on them. In food photography, this bird’s-eye perspective is frequently used. Just play with it, and you might discover a hidden treasure!
Report
Creating a flash grid attachment to create a spotlight effect is another useful do-it-yourself photography lighting technique. A piece of straw, cardboard, and an elastic band are all you need.
Saad Akhtar Report
If you already have a beautiful spot to snap a mirror image, turn the camera 90 degrees to add even more points of interest.
Report
Make your own neutral density (ND) filter using welding glass that you can find at any hardware shop rather than paying for a pricey ND filter from a camera shop. Utilize this technique to produce black and white long exposure photos.
Report
Sometimes, the unposed is actually better. Caught-in-the-moment photographs convey real moments the best. People are more likely to reflect on how they felt at the time when the picture was taken when they see a candid portrait of themselves rather than a posed one.
Report
Using reflective paper for product photography aids in obtaining more diverse light perspectives.
Report
To create a captivating background, simply go to the kitchen and grab some tin foil. You could also use crumpled foil to create an interesting texture. Then, you can set it up as a background. You can change the bokeh’s color by using a light source of a different hue and directing it to the background. To add even more creativity, place a mirror underneath the object to create a reflection effect.
Report
Duh ! A super easy way to obtain a beautiful photo backdrop is to find a wall with cool paper or an interesting pattern and just start taking pictures!
Report
You can get a smooth slide in any video using just a towel or an old rag. Simply place your camera on the towel after putting it on a flat surface. Then, after you begin filming, drag the towel across the surface for a simple, inexpensive DIY slider.
Report
Then take a photo through the glass. Voila ! Who would even catch on that it was a sunny day outside when you took the photo?
Report
Most people consider the most artistic shots as those that use a big aperture expressed as an f-number to blur the backdrop to draw more attention to a subject. However, your aperture will probably only drop to f/3.5 if you use a kit lens, which isn’t a very large aperture. However, the effects may be just as stunning as done with a macro lens.
Report
A shaking hand can cause a perfect phone photo to appear blurry and off. To prevent this from happening, try attaching two binder clips to the back or side of your phone to make a DIY tripod.
Report
Your photos will appear “softer” if you place a layer of glass between you and your subject. Windows are an excellent tool for this. You can use this approach not only for portraits but also for still life and street photography.
Report
The most common approach to incorporating neon signs into your photos is through portraiture. Allow your subject to bask in the light by having them stand next to or underneath them. Your model’s skin may take on an alluring glow thanks to the various hues they emanate. By having your subject stand against it, you may use the rich light and sharp contrast they provide to highlight specific areas of their face or body. You can also incorporate neon signs in your frame because they look fantastic in photographs.
brandonwoelfel Report
Although you may purchase your own tilt-shift lenses, they can get pretty expensive. Thankfully, today’s many smartphone apps include tilt-shift options, and Instagram is one among them. Tilt-shift lenses are pretty popular among photographers because they make it easier to manipulate the images’ focus and depth of field than other lenses. Even when the photo’s subject is still, a tilt-shift lens can give the image a sensation of motion.
Report
To create some pretty cool effects, take some of your holiday tinsel and hold it up to your camera’s lens.
Report
You may get some outstanding results if you use this photography hack properly. To benefit from how a longer exposure time blurs moving subjects and catches moving points of light, use a long shutter speed (also known as a “slow” shutter speed). Also, when using slow shutter speeds, use a tripod so that any in-focus regions are crisp and only the parts you wish to depict motion are blurred.
manuelbechter_gernottockner_fp Report
Anyone can write on Bored Panda. Start writing!
Follow Bored Panda on Google News!
Add Your Photo To This List
Please use high-res photos without watermarks
Ooops! Your image is too large, maximum file size is 8 MB.
Not your original work? Add source

